Yokomo YD-2 PLUS Unboxing and Initial Impressions
A look into Yokomo's purpose-built RWD-drift chassis, part 1.
I purchased a Yokomo YD-2 PLUS chassis kit last Tuesday from my local RC drift shop, Kong RC Drift in Lynnwood, WA. I waited for the PLUS to be released instead of picking up either the standard or the gyro-package as the PLUS came with several key upgrades that I was planning on purchasing anyways. I was able to make good progress on building the chassis yesterday, but let's first take a look at the box and its contents.Pictures:

Box - The box is the same as the regular YD-2 box, but has a "PLUS" sticker on it. It follows the YD-4 box as being closer a shoe-box in shape, as opposed to the older shirt-box shape that the DIB and DPR came in. This allows you to store your chassis in the box with some adjustments.

Manual - Comes in English. If you manual doesn't come in English, you can download one form the Yokomo website for your YD-2.

Parts List & Setting Sheet - I recommend making a bunch of copies of the setting sheet, writing down the stock settings on one of them (so you don't have to flip through the manual), and keeping a record of your changes.

Body Catalog Sheet & YD-2 Stickers - The body catalog is great for looking up part numbers of the light buckets and wing parts. For example, the HKS Hyper Silvia S15 comes in SD-HKSSA for the complete D1GP body, SD-S15LA for the light buckets, SD-HKSB for just the body, and SD=HS15W for the wing.

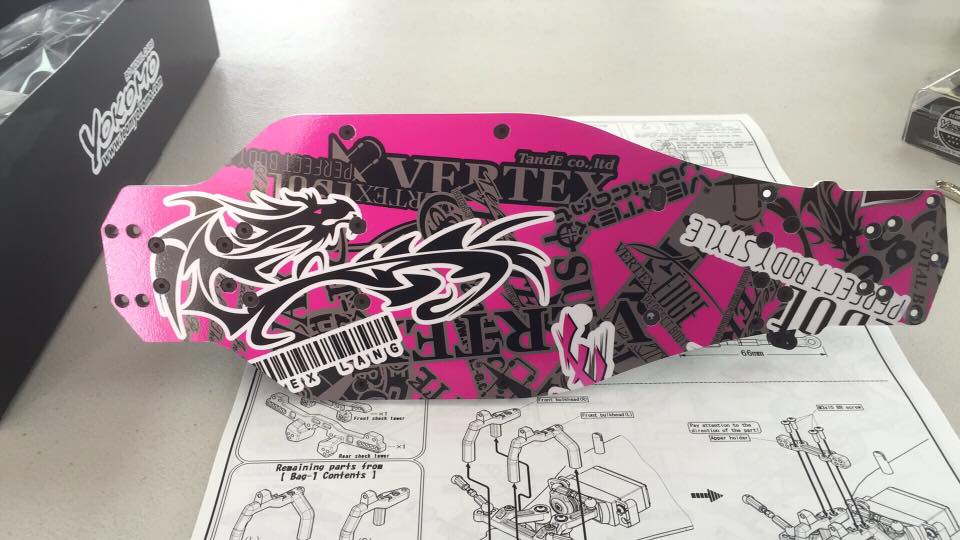
Bottom Chassis Plate - Your friendly carbon fiber chassis plate. This is one of the parts that makes the PLUS a PLUS, but is available separately.


Bag 5 & 6 - These contain your servo saver and mount, plastic wheel hexes, and suspension tower components. The plastic suspension blocks will not be used in the PLUS.

Bag 7 & 8 - These contain your front suspension upper and lower arms, front aluminum suspension block (PLUS part), knuckles, drive shafts and other suspension goodies. Pay attention to the ball ends so you don't try to use a 4.3mm ball end where you want to use the king pin ball end.

Bag 9 & 10 - These contain your rear suspension arms, aluminum rear suspension block (PLUS part), and SLF Big Bore dampers (PLUS parts).

Bag 11 & 12 - These contain your bumper support, body posts, rear diffuser (different from the YD-4s), battery holders, battery foam, and carbon upper deck (PLUS part).

Misc Stuff - Bumper, antenna wire tube, bag of small tools, and instructions on how to install your gyro.
Overall Initial Impression - Overall, I am really impressed with the ease of building this chassis. I was able to install everything through bag 9 in about 4 hours (see bottom picture), despite tracing, cutting, and applying a custom vinyl chassis protector (see first picture), hanging out with friends, and driving on the side. For a first-time driver, any of the YD-2 chassis would be a great start as there's nothing tricky or crazy about the instructions. The steering is smooth but precise despite its plastic arms, and has a wonderful amount of lock. I've thought about replacing the battery holder with the DRB's, but I believe that require drilling additional holes in the chassis plate. The chassis is definitely biased towards the rear with majority of the weight being the battery and motor.
Future Plans - I'll be installing a 8.5t Yokomo Racing Performer motor (currently mocked in place) along with their BL-RS3 brushless ESC. The servo is a Yokomo SP6099 mounted in a pink Usukani servo mount. The only other non-stock part I have installed currently are Yokomo D-165 RWD front knuckles (with the YD-2's front axles).

If you have any questions, please don't be afraid to comment.
No comments:
Post a Comment