Friday, December 30, 2016

New Facebook Page

New Facebook Page 

More content is more places.


Hello everybody,

I've been working on a Facebook page as a supplement to this blog as there are often small things that I don't feel need their own blog posts but I still want to share. Also, a lot of people really are more dialed into Facebook than the blogs so I'm going to use both platforms to their fullest.

So please check out my Facebook page at https://www.facebook.com/MSDrift/ and let me know what you think!

-Drift Gundam

Sunday, September 11, 2016

Body Build - Yokomo HKS Hiper Silvia (S15), Part 1.

Body Build - Yokomo HKS Hiper Silvia (S15), Part 1.

Background details.


The Yokomo HKS Hiper Silvia (S15) is one of three S15 bodies that Yokomo makes, the other two being the Team BOSS with POTENZA S15 and the Team TOYO with GP SPORTS S15 SILVIA. However, while the Team BOSS and Team TOYO S15s have different livery and are different colors, there's actually very little difference between their two bodies with the exception of a duck-tail spoiler on the trunk of the Team BOSS S15. However, the HKS S15 features its own body kit, a VERTEX Ridge S15 Widebody System and this is why I selected it - I wanted a VERTEX-kitted body for my VERTEX-decorated chassis.


HKS introduced their S15 in February of 2002, winning the 2nd round at Ebisu and placing 2nd that year. In the following year, the S15 was introduced during the 5th round at Ebisu and placed 4th. In 2004, HKS raced their Toyota Altezza (also available as a body from Yokomo).


Photos of the HKS Hiper Silvia in Action:


Photos of the Yokomo HKS Hiper Silvia:


Comparing the two, the limitations of working in vacuum-formed lexan becomes pretty clear. The chin spoilers are slightly two high on the Yokomo body and not nearly as sharp as the real thing.

Tuesday, September 6, 2016

Team Tetsujin Selection Light System (SLS) Initial Look

Team Tetsujin Selection Light System (SLS) Initial Look

Unboxing of Team Tetsujin's new lighting system

Team Testujin released not too long ago a new, modular lighting system for RC cars. It is comprised of three parts, a controller unit, a wiring harness, and the LEDs. The controller unit plugs into a Y-harness that receives signals from your throttle channel. The wiring harness comes with or without LEDs in 7 different options (4 front, 3 rear). The LEDs come in 10 different colors, sold in pairs of the same color.


Packaging (from left to right) - TT-7510 Control Board, TT-7813 LED Set for Front 8 LEDs, TT-7815 LED Set for Rear 10 LEDs


Current Product List - LED Control Board, AC Adapter for Display (so you don't have to have it plugged into a car's receiver), Spare Cable for Front 10 LEDs (no LEDs included), Spare Cable for Rear 10 LEDs (no LEDs included), LED Set for Front 4 LEDs, LED Set for Front 8 LEDs, LED Set for Front 10 LEDs, LED Set for Rear 5 LEDs, & LED Set for Rear 10 LEDs.


Control Board


Rear Wiring Harness w/ Wire Keeper


Front LED Harness w/ Wire Keeper

Initial Thoughts - I helped a fellow driver install this lighting system in their car on Saturday and made the following observations:

  • One side of the wiring harness is longer than the other so keep this in mind when attaching it to your car body.
  • The wires tangle very easily so cut the wire keeper in half and use it to straighten out the two sides before installing it in your car.
  • Plugging in the LED before installation will help you determine which LEDs go where. 

Monday, September 5, 2016

Yokomo YD-2 PLUS Unboxing and Initial Impressions

Yokomo YD-2 PLUS Unboxing and Initial Impressions

A look into Yokomo's purpose-built RWD-drift chassis, part 1.

I purchased a Yokomo YD-2 PLUS chassis kit last Tuesday from my local RC drift shop, Kong RC Drift in Lynnwood, WA. I waited for the PLUS to be released instead of picking up either the standard or the gyro-package as the PLUS came with several key upgrades that I was planning on purchasing anyways. I was able to make good progress on building the chassis yesterday, but let's first take a look at the box and its contents.
Pictures:

Box - The box is the same as the regular YD-2 box, but has a "PLUS" sticker on it. It follows the YD-4 box as being closer a shoe-box in shape, as opposed to the older shirt-box shape that the DIB and DPR came in. This allows you to store your chassis in the box with some adjustments. 


Manual - Comes in English. If you manual doesn't come in English, you can download one form the Yokomo website for your YD-2.


Parts List & Setting Sheet - I recommend making a bunch of copies of the setting sheet, writing down the stock settings on one of them (so you don't have to flip through the manual), and keeping a record of your changes.


Body Catalog Sheet & YD-2 Stickers - The body catalog is great for looking up part numbers of the light buckets and wing parts. For example, the HKS Hyper Silvia S15 comes in SD-HKSSA for the complete D1GP body, SD-S15LA for the light buckets, SD-HKSB for just the body, and SD=HS15W for the wing.


Bottom Chassis Plate - Your friendly carbon fiber chassis plate. This is one of the parts that makes the PLUS a PLUS, but is available separately.


Bags 1 & 2 - These contain your ball ends, steering parts, inner aluminum suspension mounts (PLUS parts), and plastic supports.


Bag 3 & 4 - These contain your gear differential, your gearbox, and drive components. Many of these parts are shared with the YZ-2 and B-MAX.


Bag 5 & 6 - These contain your servo saver and mount, plastic wheel hexes, and suspension tower components. The plastic suspension blocks will not be used in the PLUS.


Bag 7 & 8 - These contain your front suspension upper and lower arms, front aluminum suspension block (PLUS part), knuckles, drive shafts and other suspension goodies. Pay attention to the ball ends so you don't try to use a 4.3mm ball end where you want to use the king pin ball end.


Bag 9 & 10 - These contain your rear suspension arms, aluminum rear suspension block (PLUS part), and SLF Big Bore dampers (PLUS parts).


Bag 11 & 12 - These contain your bumper support, body posts, rear diffuser (different from the YD-4s), battery holders, battery foam, and carbon upper deck (PLUS part).


Misc Stuff - Bumper, antenna wire tube, bag of small tools, and instructions on how to install your gyro.

Overall Initial Impression - Overall, I am really impressed with the ease of building this chassis. I was able to install everything through bag 9 in about 4 hours (see bottom picture), despite tracing, cutting, and applying a custom vinyl chassis protector (see first picture), hanging out with friends, and driving on the side. For a first-time driver, any of the YD-2 chassis would be a great start as there's nothing tricky or crazy about the instructions. The steering is smooth but precise despite its plastic arms, and has a wonderful amount of lock. I've thought about replacing the battery holder with the DRB's, but I believe that require drilling additional holes in the chassis plate. The chassis is definitely biased towards the rear with majority of the weight being the battery and motor.

Future Plans - I'll be installing a 8.5t Yokomo Racing Performer motor (currently mocked in place) along with their BL-RS3 brushless ESC. The servo is a Yokomo SP6099 mounted in a pink Usukani servo mount. The only other non-stock part I have installed currently are Yokomo D-165 RWD front knuckles (with the YD-2's front axles).


If you have any questions, please don't be afraid to comment.

Tuesday, August 9, 2016

Body Build - Yokomo RS☆R JZA80 Supra, Part 1.

Body Build - Yokomo RS☆R JZA80 Supra, Part 1.

Background details & unbagging.


The Toyota JZA80 Supra, with its plethora of headlights and taillights, flowing body style, and 3-door hatchback design strikes me as one of the essential bodies to own. Compared to its sibling, the Toyota JZZ30 Soarer/Lexus SC 300/400 it is aggressive while the Lexus is refined, though both of them would look great sliding around your local 1/10 scale drift course. Several companies make 1/10 JZA80s, including HPI, Pandora, Tamiya, and Yokomo. As I own neither Supra nor Soarer, I decided to purchase the Yokomo D1GP option, complete with Sport-Service RS☆R livery. But before I show you what comes in the D1GP option's bag, let's take a look at both the real car and Yokomo's product photos:

Photos of the RS☆R Supra in Action:


Photos of the Yokomo RS☆R JZA80 Supra:


Comparing the two, several differences are noticeable. First, the Yokomo does not feature the fog lights mounted in the front bumper. Why this is, I do not know, but it could be due to changes in the car between its first appearance in the mid-2000s and how it appears now in the mid-2010s. Second, the sponsors logos in some areas have chanced, due to a change in sponsors. Third, the wheels have changed from 6-spoke Yokohama AVS Model T6s to some 12-spoke wheels, perhaps Rays Gram Light 57Extremes. Lastly, but more of the byproduct of manufacturing is the shape of the roof-line and the side windows. The Yokomo looks decidedly shorter when compared side-to-side with the real thing. Nevertheless, I think this replica would look great mounted on the upcoming YD-2 chassis.

Unbagging Photos:


Body Shell


Rear Diffuser and Side Diffusers (behind front wheels)


Wing, Wing Mount, Exhaust, Wipers, & Mirrors


Yokomo Body Catalog


Instruction Booklet


Window Masks


Decals for Lights, Carbon Fiber Areas, & Front Bumper


Front Headlight Trim & Window Decals


Livery Guide


Body Markings


RS☆R Decals


Sponsor Decals

Not pictured was the piece of pressboard that keeps the decal sheets from being crushed or wrinkled. While the body markings and RS☆R decals are precut, the sponsor decals are not so you will have to take your time and cut those out. A nice feature of the body markings is that there are guide lines that will help you with placing them. I do not intend to use the window decals or the light decals as I plan on using Yokomo's chromed light buckets for this body.

In part 2 of this series, I will be prepping the body for painting, selecting the paint color, and finally painting it. Applying the decals and accessory parts will make up part 3 of this series. Thank you for following along.

Monday, August 8, 2016

Tools & Storage Solutions, part 2.

Tools & Storage Solutions, part 2.

Part two of a multi-part series about how to keep things from getting lost while building, store your spare parts, eliminate (some) frustration, and generally stay organized.


Part one of this series focused upon how not to lose things during construction and storage. This article will focus on the tools that I use to build and tune RC chassis. I will not go into painting as that is a topic for another time.

Cutting Implements

I use two different tools for cutting plastic parts off of their spurs and to clean them up. First, I use a pair of side-nippers such as these Xuron 2175 Maxi-Shear Flush Cutter to remove the part. Then I use a standard X-acto knife to clean up the remaining seam line and left-over excess plastic. This is something I've always done when working with injection-molded plastic parts, whether it be for a 1/35 Tamiya tank, a 1/100 Master Grade Gunpla, or a 1/10 Overdose XEX chassis. Depending on the plastic, I'll use my special Tamiya Sharp Pointed Side Cutter NO.123 (74123) but this is only for ball-end caps as I prefer to save these side-cutters for Gunpla.

Screwdrivers/Allen-Keys

I use either Tamiya screwdrivers, Wera Kraftform hex and nut-drivers, or Bondhus Allen-keys when building as I found that with tools, it's better to spend a little more for something that will last a long time than to cheap out and use something that could break over time or worse, round-out a screw, leaving it stuck in the plastic or metal.

The Wera drivers I use are the Wera Kraftform Plus 354 Hex-Plus 2.5mm, the Wera Kraftform Plus 354 Hex-Plus 2mm, and the Wera Kraftform Micro 2054 1.5mm. I first was introduced to these screwdrivers at my local hardware store, which had some extra-long, serrated Phillips-head screwdrivers. They are made in Europe and depending on the size, have either the hex or Hex-Plus heads, which are very similar to a hex but have slightly rotated sides so that more or the tool contacts the fastener. I don't know if this really makes a difference, but I've yet to round out any fastener using them. However, Wera screwdrivers are a bit pricey for some at ~$10 each, but given that chassis average ~$300, spending maybe a tenth of that on a set of tools that you'll have for the life of the chassis is well worth it in my opinion.

If your wallet needs a break, Bondhus makes several excellent sets of Allen-keys. Either in their "ProGuard" or "BriteGuard" finish,these tools feature a ball-end hex that allows you to angle the L-wrench around 20-degrees, which helps get around things that might get in your way. This really isn't a feature that helps during construction, but it does help immensely during maintenance and disassembly.
Pliers

Soft-jaw pliers have been my most-recent tool purchase as they allow me to remove turnbuckles and work on shocks without worrying about marring the parts. You can purchase either the Tamiya pliers or the IPS pliers, which make those pliers for Tamiya and are several dollars less. Having the Tamiya name will not make your car three-times faster or drive three-times better, and they're not red.

Sunday, August 7, 2016

Tools & Storage Solutions, part 1.

Tools & Storage Solutions, part 1.

Part one of a multi-part series about how to keep things from getting lost while building, store your spare parts, eliminate (some) frustration, and generally stay organized.


I'm sure that every single one of you have encountered that sinking feeling of knowing you had a specific part, but couldn't find it. It happened to me yesterday when I was building my Nervis 2.0 and I was looking for a 0.3mm shim that fits between my servo and servo horn. Luckily I found it in a plastic bag in the Nevis 2.0's box, but it could have ended very poorly as that particular shim was sized for this specific purpose and Wrap-Up only included one.

Keeping Parts off the Floor and Out of the Carpet

When building an RC car kit, whether it be from MST, Overdose, Tamiya, 3Racing, or Yokomo (the brands I have experience with), the parts normally come segregated in plastic bags that are numbered. These numbers often correspond with the step in the instructions where they are used. However, sometimes parts from one bag are not used completely and are later used in a subsequent step. Therefore, you're going to have to store them for later.

What I used for storing parts during construction are Plano 3600 ProLatch StowAway boxes. Plano makes StowAway boxes in three series- 3500, 3600, and 3700. The 3500-series has the smallest boxes, the 3700-series has the largest boxes, and the 3600-series has boxes that are in the middle. Additionally, the 3600-series of boxes has the greatest variety of boxes, which is more important than actual box size in my opinion.

You can buy the boxes by themselves, or you can buy them with a carrier such as the Plano 1364 3600 Stowaway Rack System, which comes with 4 of the 3600-series boxes. I bought one off Amazon and it is currently holding my spare parts and hop-ups. I have one box dedicated to just hardware and shims, another dedicated to suspension components, another dedicated to drive train components such as axles and gears, and the last box dedicated to miscellaneous parts. At $40 shipped, I think it is a good investment as it is a pretty big step up from storing parts in plastic bags in cardboard boxes. I have a Plano 7271, which also uses the 3600-series boxes, which means I have 7 of those boxes that I can swap from one box to another, depending on which items I'll need (building vs upgrading & maintenance). I keep one on my workstation and the other under it so as not to take up too much space.

Another items that I find useful is a magnetic parts tray. While we work with aluminum, stainless steel, and other non-magnetic items, the vast majority of parts that we use are magnetic and had a tendency to end up rolling around on your desk after you've removed them from your plastic parts bag. You can use a plastic cup or the large section of the 3600-box for this, but I find the former aren't really big enough and the latter has the lid which takes up space. I think the rectangular ones, such as this TEKTON 1903 Rectangle Magnetic Parts Tray, do a better job of using space than the round ones and would recommend that you use one that is large enough to hold everything in the bag without clumping them together. Often screws look very similar and if you take the time to sort them out on your parts tray, you can avoid having using the wrong screw.

My next article in this series will be on the tools that I use to work on RC-cars.

Saturday, August 6, 2016

Happy Hachi Roku Day

Happy Hachi Roku Day!

A very busy day this year too.

Today is August 6, which many refer to as "Hachi Roku" Day in celebration of the classic Toyota AE86. Regardless of if it is a  coup or hatchback, has the Levin's fixed or the Trueno's pop-up headlights, these cars are definitely some of my favorite, with my personal favorite being the Trueno hatchback. For those who didn't know, Levin and Trueno are not Japanese words, but rather are the Middle English and Spanish words for "lighting" and "thunder", respectively.
 
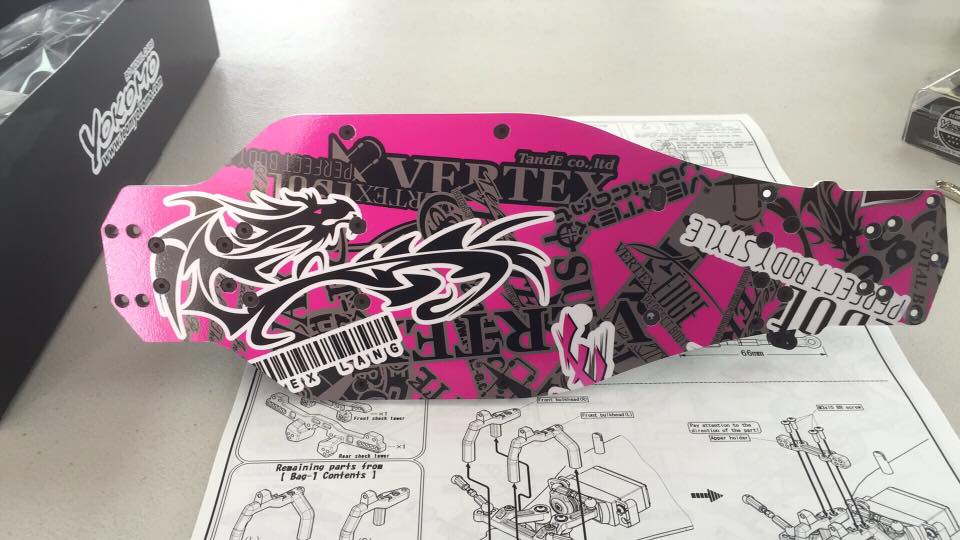
I painted a Yokomo Trueno street-version hatchback shell not too long ago (featured in an earlier post) and I thought purchasing the opposite style, a D1GP Levin coup with T&E body kit, as a celebratory body kit but decided against it as I had already purchased several bodies last week. However, one body I would like to eventually purchase would be a modern 86/BRZ/FR-2 and Yokomo makes several D1GP replicas:


The HKS Racing Performer 86*


The Up Garage Falken 86*
 
 
The Drive M7 Advan Max Orido Racing 86*

Of the three, I like the HKS and the Up Garage the best due to the nature of their body kits. The Drive M7, while it has the increasingly popular rear-mounted wing that I like, has a rather busy front bumper. The HKS, with its rather simple single-opening for the intercooler is rather fierce and the Up Garage's #-pattern flows well into the front fenders. However, which shell do you like the best?

Overdose and Tamiya also make some rather nice body shells, though the Overdose shell is of the Scion FR-S and the Tamiya shells are more often than not subjected to an Addiction Rocket Bunny body kit, which would add to the overall cost and complexity.

*Images courtesy of Yokomo.com.