Body Build - Yokomo HKS Hiper Silvia (S15), Part 1.
Background details.
The Yokomo HKS Hiper Silvia (S15) is one of three S15 bodies that Yokomo makes, the other two being the Team BOSS with POTENZA S15 and the Team TOYO with GP SPORTS S15 SILVIA. However, while the Team BOSS and Team TOYO S15s have different livery and are different colors, there's actually very little difference between their two bodies with the exception of a duck-tail spoiler on the trunk of the Team BOSS S15. However, the HKS S15 features its own body kit, a VERTEX Ridge S15 Widebody System and this is why I selected it - I wanted a VERTEX-kitted body for my VERTEX-decorated chassis.
HKS introduced their S15 in February of 2002, winning the 2nd round at Ebisu and placing 2nd that year. In the following year, the S15 was introduced during the 5th round at Ebisu and placed 4th. In 2004, HKS raced their Toyota Altezza (also available as a body from Yokomo).
Photos of the HKS Hiper Silvia in Action:
Photos of the Yokomo HKS Hiper Silvia:
Comparing the two, the limitations of working in vacuum-formed lexan becomes pretty clear. The chin spoilers are slightly two high on the Yokomo body and not nearly as sharp as the real thing.
Team Tetsujin Selection Light System (SLS) Initial Look
Unboxing of Team Tetsujin's new lighting system
Team Testujin released not too long ago a new, modular lighting system for RC cars. It is comprised of three parts, a controller unit, a wiring harness, and the LEDs. The controller unit plugs into a Y-harness that receives signals from your throttle channel. The wiring harness comes with or without LEDs in 7 different options (4 front, 3 rear). The LEDs come in 10 different colors, sold in pairs of the same color.
Packaging (from left to right) - TT-7510 Control Board, TT-7813 LED Set for Front 8 LEDs, TT-7815 LED Set for Rear 10 LEDs
Current Product List - LED Control Board, AC Adapter for Display (so you don't have to have it plugged into a car's receiver), Spare Cable for Front 10 LEDs (no LEDs included), Spare Cable for Rear 10 LEDs (no LEDs included), LED Set for Front 4 LEDs, LED Set for Front 8 LEDs, LED Set for Front 10 LEDs, LED Set for Rear 5 LEDs, & LED Set for Rear 10 LEDs.
Control Board
Rear Wiring Harness w/ Wire Keeper
Front LED Harness w/ Wire Keeper
Initial Thoughts - I helped a fellow driver install this lighting system in their car on Saturday and made the following observations:
- One side of the wiring harness is longer than the other so keep this in mind when attaching it to your car body.
- The wires tangle very easily so cut the wire keeper in half and use it to straighten out the two sides before installing it in your car.
- Plugging in the LED before installation will help you determine which LEDs go where.
Yokomo YD-2 PLUS Unboxing and Initial Impressions
A look into Yokomo's purpose-built RWD-drift chassis, part 1.
I purchased a Yokomo YD-2 PLUS chassis kit last Tuesday from my local RC drift shop, Kong RC Drift in Lynnwood, WA. I waited for the PLUS to be released instead of picking up either the standard or the gyro-package as the PLUS came with several key upgrades that I was planning on purchasing anyways. I was able to make good progress on building the chassis yesterday, but let's first take a look at the box and its contents.
Pictures:
Box - The box is the same as the regular YD-2 box, but has a "PLUS" sticker on it. It follows the YD-4 box as being closer a shoe-box in shape, as opposed to the older shirt-box shape that the DIB and DPR came in. This allows you to store your chassis in the box with some adjustments.
Manual - Comes in English. If you manual doesn't come in English, you can download one form the Yokomo website for your YD-2.
Parts List & Setting Sheet - I recommend making a bunch of copies of the setting sheet, writing down the stock settings on one of them (so you don't have to flip through the manual), and keeping a record of your changes.
Body Catalog Sheet & YD-2 Stickers - The body catalog is great for looking up part numbers of the light buckets and wing parts. For example, the HKS Hyper Silvia S15 comes in SD-HKSSA for the complete D1GP body, SD-S15LA for the light buckets, SD-HKSB for just the body, and SD=HS15W for the wing.
Bottom Chassis Plate - Your friendly carbon fiber chassis plate. This is one of the parts that makes the PLUS a PLUS, but is available separately.
Bags 1 & 2 - These contain your ball ends, steering parts, inner aluminum suspension mounts (PLUS parts), and plastic supports.
Bag 3 & 4 - These contain your gear differential, your gearbox, and drive components. Many of these parts are shared with the YZ-2 and B-MAX.
Bag 5 & 6 - These contain your servo saver and mount, plastic wheel hexes, and suspension tower components. The plastic suspension blocks will not be used in the PLUS.
Bag 7 & 8 - These contain your front suspension upper and lower arms, front aluminum suspension block (PLUS part), knuckles, drive shafts and other suspension goodies. Pay attention to the ball ends so you don't try to use a 4.3mm ball end where you want to use the king pin ball end.
Bag 9 & 10 - These contain your rear suspension arms, aluminum rear suspension block (PLUS part), and SLF Big Bore dampers (PLUS parts).
Bag 11 & 12 - These contain your bumper support, body posts, rear diffuser (different from the YD-4s), battery holders, battery foam, and carbon upper deck (PLUS part).
Misc Stuff - Bumper, antenna wire tube, bag of small tools, and instructions on how to install your gyro.
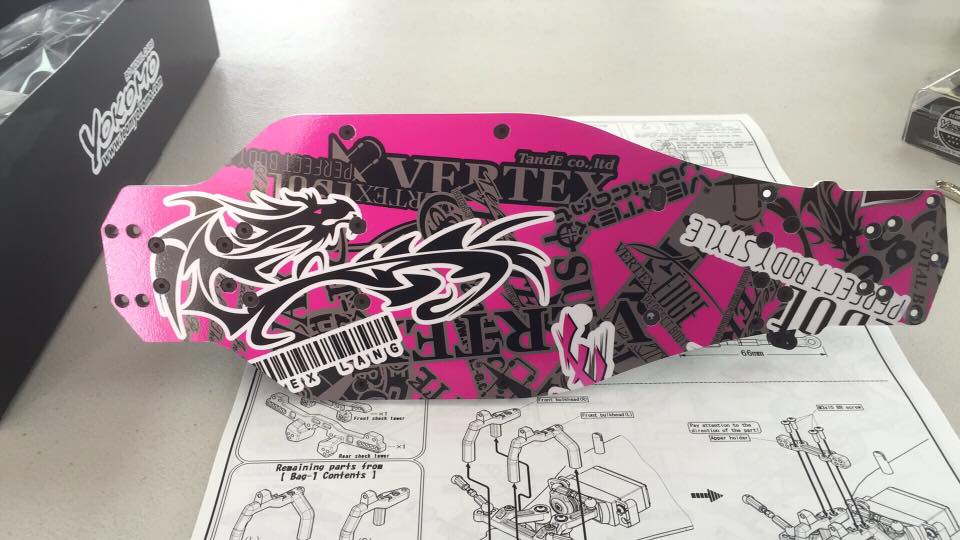
Overall Initial Impression - Overall, I am really impressed with the ease of building this chassis. I was able to install everything through bag 9 in about 4 hours (see bottom picture), despite tracing, cutting, and applying a custom vinyl chassis protector (see first picture), hanging out with friends, and driving on the side. For a first-time driver, any of the YD-2 chassis would be a great start as there's nothing tricky or crazy about the instructions. The steering is smooth but precise despite its plastic arms, and has a wonderful amount of lock. I've thought about replacing the battery holder with the DRB's, but I believe that require drilling additional holes in the chassis plate. The chassis is definitely biased towards the rear with majority of the weight being the battery and motor.
Future Plans - I'll be installing a 8.5t Yokomo Racing Performer motor (currently mocked in place) along with their BL-RS3 brushless ESC. The servo is a Yokomo SP6099 mounted in a pink Usukani servo mount. The only other non-stock part I have installed currently are Yokomo D-165 RWD front knuckles (with the YD-2's front axles).
If you have any questions, please don't be afraid to comment.